Adding Students
There are two ways of adding students.
- Using an invitation link (easiest)
- Adding students in bulk
- Adding students one by one
Inviting students using a link
Anyone who has used a google product will quickly recognize how you can invite someone to an app using a link
StudyLab provides the same feature.
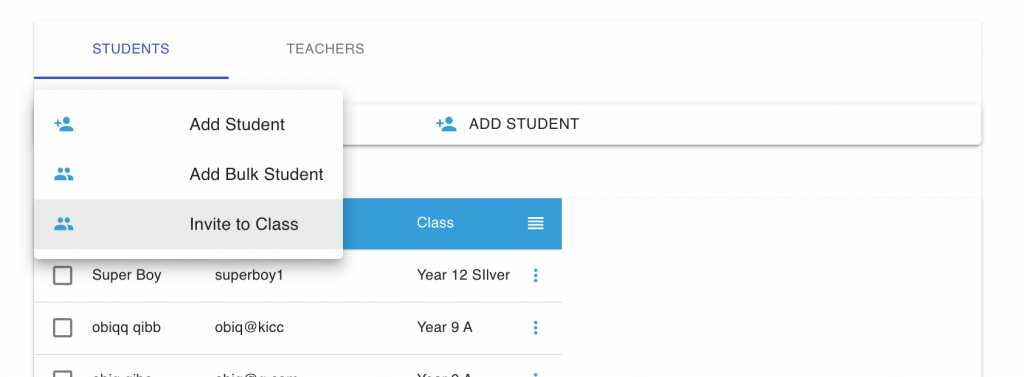
1. Navigate to classes and users page
2. click ‘add Student button’ and select invite with link
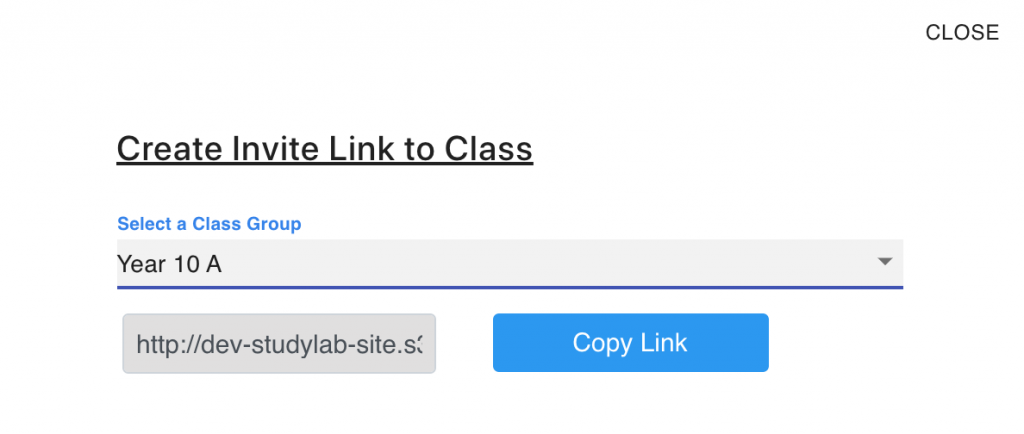
3. Then select a subject group and then click on copy link. This will copy the unique link for that class
4. share the link to students (specify what subject group that link is for)
5. When students click the link, it will take them to a page asking them to Sign In. if they already have an individual account, they should sign in. but if they dont have an account yet they should click the signup button
6 Fill the form use their email as user name and click submit
Adding Students in Bulk
- Navigate to classes and users page
- Select the class group you want to add students to from the class group panel
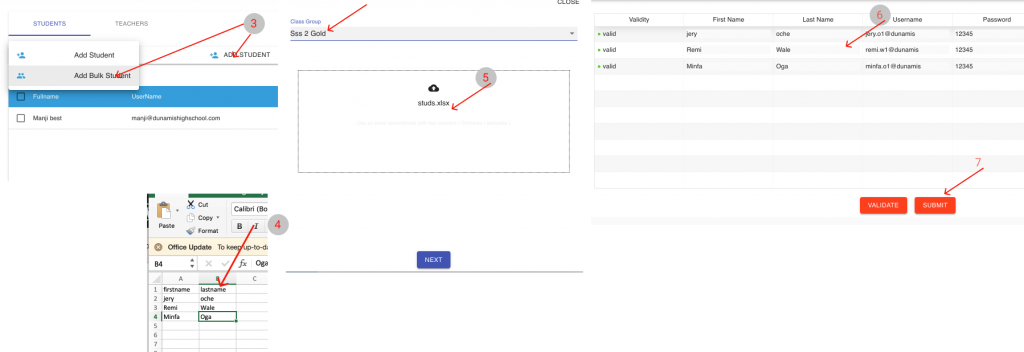
- Click the add students button on the users panel and select add bulk students.
- You are given a panel where the class group is selected and you are asked to upload an excel spreadsheet
Rule 1: The excel spreadsheet must have only data for that class group and no other class group
Rule 2: It must have only two columns. One for firstname and one for lastname
Rule 3: The 1st row must have the FirstName and Last name heading - Drag the excel to the panel and click next.
- The system will parse the list and show you that it is validated. It will give you the username and password of each student.
(If you make any change to the username, click on validate to check if the system will accept that change) else - Click Submit.
You might have to deselect and reselect the class group to see the students for that class group
To Add one-by-one
- Click add student button
- Select add student
- Fill the form and click submit
To add or remove a student from a subject group
To add or remove a student from a class group, a easy way to do this is from the subject group card on the dashboard
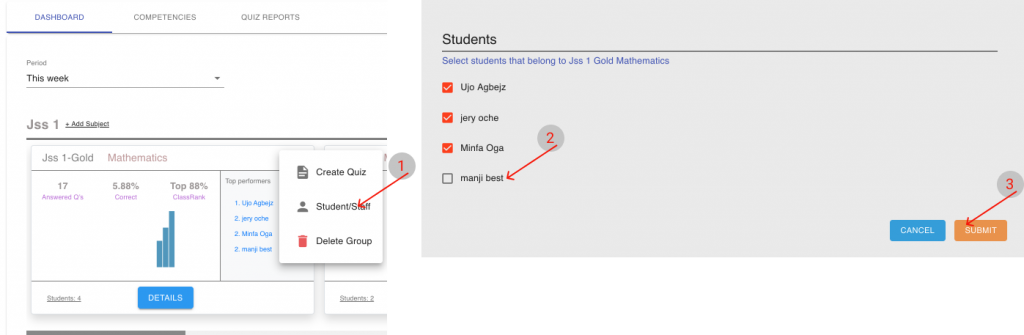
- On the dashboard, locate the subject group from clicking on the class
- On the subject group card, click on the three dots menu
- Select student/staff from the menu
- By default all students are enrolled in a subject, therefore they will all be selected
de-select students who are not meant to take that class
select students (or staff) who are meant to take that class - Scroll down and click submit
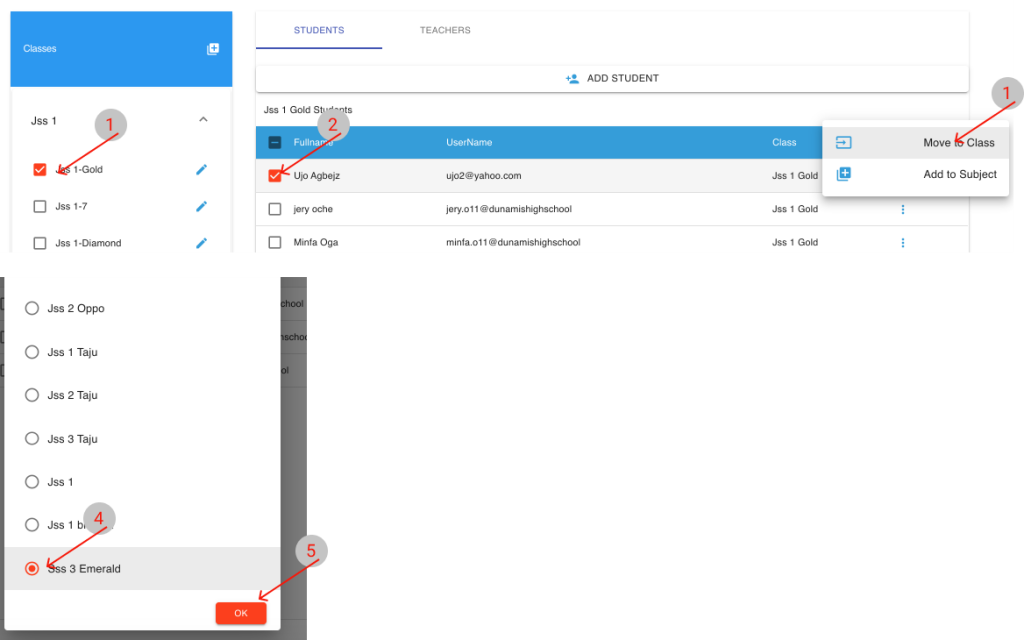
Moving students from one class to another
- Go to the Classes and Users menu from the class group panel, select the class where the student(s) is located.
- From the user panel, locate the student and select him/her (or select all of them).
- On the table header, select the three line menu and select move to class
- Select the class the students should be moved to and click OK
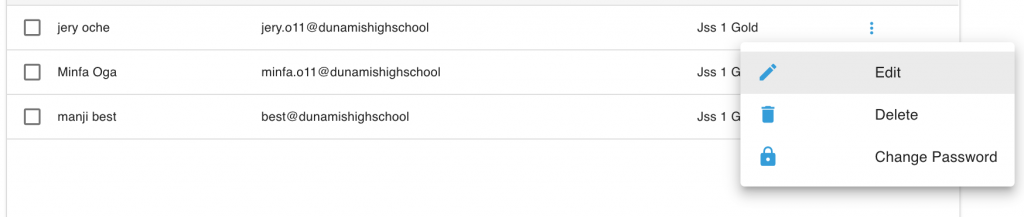
To delete a student, edit or change his/her password
- Using the skills learnt above, navigate to the students class so that he loads in the user panel
- locate the student in the table and go to the end of the row where you see the three dots menu by his/her name
- Click the menu and select either delete. edit or change password
Adding teachers
- Go to the users and Classes menu
- On the user panel click teacher
- Click add teacher
- fill the form
Note that if a teachers email exists in our database, you will give you an eror. In this case try to use another email - Select the subject group(s) the teacher teachers
- Submit the form
Watch the video here
http://bit.ly/stlb-users